
Connecting to Xero
Set-Up:
1. Go to https://app.xero.com/ in your browser and log in.
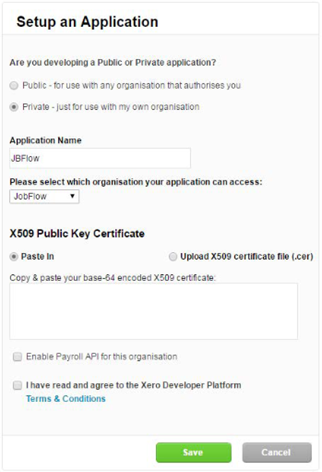
2. Go to the My Apps tab and click ‘Add Application’. This brings up the ‘Setup an Application’ tab.
- Select ‘Private’
- Enter ‘JobFlow’ under the Application Name
- The X509 Public Key Certificate will probably be set to Paste, if so simply paste the text version of the public key into the text box Xero presents.
- Tick the ‘Terms and Conditions’ box
- Click Save
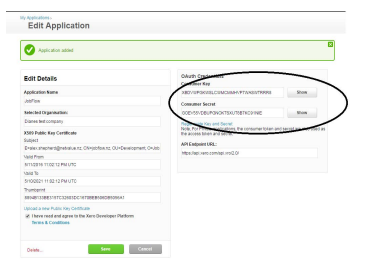
3. This will bring up a screen with the credentials that you need to send to us. Click ‘Show’ by the Consumer key and Consumer secret boxes. Copy and paste these two codes into an email back through to us, and we'll set that up against your JobFlow account
- We will let you know when it has been added so that you can test it.
How will I know if it has worked?
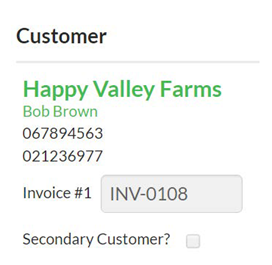
- When you go into JobFlow select a job that is ready to be invoiced (assuming that it has been checked and billing details are correct).
- Change the status to ‘Invoice’ and save the Job.
- The job screen will be updated, and the Invoice box under the customer details.
Item Codes:
When JobFlow connects with Xero, the codes set up as your Xero Item Codes will synchronise back down to JobFlow. You will then be able to go into the templates and Stock and select the item code from a list.
Account Codes:
When JobFlow connects with Xero, the codes set up in your Xero Chart of Accounts will synchronise back down to JobFlow.
You will then be able to go in to the templates and Stock and select the GL code from a list.
Client Details:
JobFlow synchronises its client information with the client information set up in Xero based on the trading name.
- If it cannot find a client with the same trading name in Xero, then a new one will be created.
- If you update your client details in JobFlow then they will be updated in Zero.